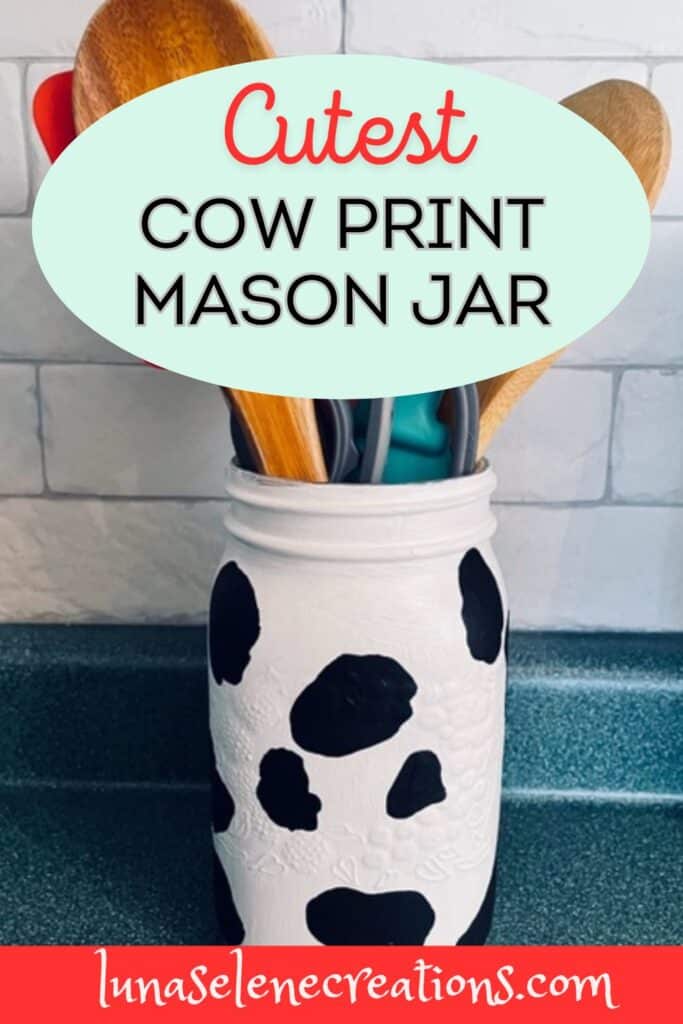
Cow print mason jars are one of my absolute favourite DIY glass jar crafts to do! They are so simple to make and the perfect touch for farmhouse decor.

Some of my blog posts may contain affiliate links, from which I may receive a small commission at no additional cost to you.
These cute cow mason jars go great with farmhouse decor and make lovely centrepieces for a country-themed party, bridal shower, or barn wedding. I like making these with the large jars (32 oz.) but you can make them any size to suit your needs.
Don’t worry, even if you are not super crafty or artistic, this is one mason jar craft that anyone can pull off!
I will take you through the whole process step-by-step. If you’re more of a visual learner, check out the video tutorial at the end of this post.
Black & White Cow Print Mason Jars Materials
Here is a list of all the supplies you will need to paint your super cute cow mason jar!
- Mason Jar
- 70% Rubbing Alcohol
- Pencil
- Medium-sized flat paintbrush
- Small round tip paintbrush or liner brush
- Palette or plastic plate
- White Paint (chalk paint, acrylic, or multi-surface)
- Black paint (acrylic, multi-surface, or enamel)
- Fine grit sandpaper sanding sponge, or block (OPTIONAL)
- Mod Podge or other acrylic sealer
- Jute cord, twine, or lace ribbon

1. Clean & Prepare The Mason Jar
If you are using a brand-new jar, simply clean the outside of it with rubbing alcohol and a paper towel. This is to ensure no fingerprints or oils from your hands are on the jar which helps the paint adhere better to the glass.
If you are upcycling a jar from your pantry be sure to wash it thoroughly in warm soapy water. If the jar has a label, soak it in hot soapy water until the label falls off.
Any residual glue can be removed with Goo-Gone or a mixture of Lemon essential oil and dish soap (I like blue Dawn).
Rinse the jar well and let dry completely.
2. Paint The Jar White
Pour the white paint onto a disposable plastic plate or palette. You don’t need anything fancy here, you can even use the lid from an old margarine tub as a paint palette.
If you choose to use chalk paint and the can is on the small side just dip your paintbrush right in and skip the palette.
- Use a medium flat brush for this step, maybe an inch wide or so.
- Hold the jar by the rim and paint the body first.
- Apply the paint using vertical and horizontal brush strokes.
Don’t worry about this first coat looking perfect or the brushstrokes being visible. As a matter of fact, having some brushstrokes visible on the finished project gives it a rustic look which I actually think looks quite nice!
You can also pounce the paint on with a sponge dobber instead of a paintbrush. This painting technique eliminates brushstrokes and give the jar a textured look.
Do not paint the bottom of the jar yet, this way you can set it on your work surface without making a mess. You paint the bottom at the very end.
- Once the body is painted with the first coat, set the jar on the table and paint the rim.
- Use a smaller brush for this step to get in the threads of the jar if you like.
- Remember, these cow print Mason jars are meant to look rustic so they don’t need to be perfect. Don’t overthink it!
Quick Tip:
If you plan to have a lid on your finished jar apply only a thin coat of paint on the threads at the top otherwise the metal band won’t screw on properly. OR, don’t paint this part at all.
- Let the jar dry completely, for a couple of hours or preferably overnight.
- Paint a second coat of white using the same process as the first.
- At the very end, flip your jar upside down and paint the bottom. Alternatively, you can leave the bottom unpainted, it’s entirely up to you. Artistic license, right??
- Let the second coat dry completely.
3. Distress Jar With Sandpaper
If you want your cow Mason jar to have a more rustic or shabby chic look, you can distress the jar by removing some of the paint with fine grit sandpaper or a sanding block.
- Simply sand off as little or as much as you want.
- Focus on the raised parts of the glass like the lettering, the threads on the neck of the jar, and the bottom edge.
- After sanding, wipe down the jar thoroughly with a dry cloth to remove the dust residue.
Draw On Cow Spots With Pencil
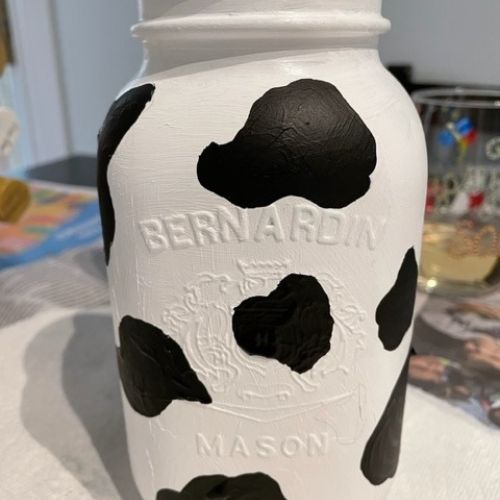
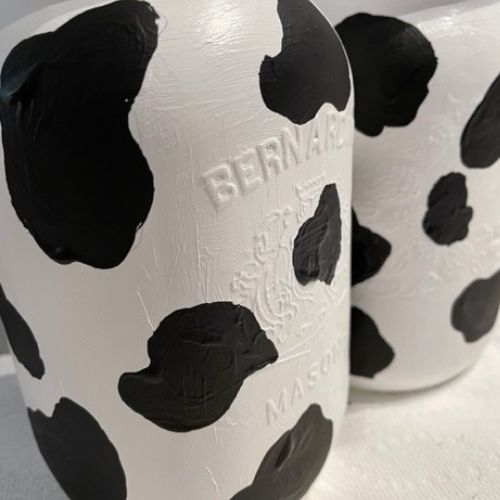
Using a light pencil, draw on cow print spots in random places. If you need a little inspiration for the shape of the splotches, just search up cow print pattern on Google or Pinterest and there will be tons you can copy.
Again, remember there is no right or wrong way to paint a cow print shape but I will say, don’t overcrowd your black spots.
Leave enough white (negative) space on your design. If you mess up, just erase it and try again!
Paint The Cow Spots Black
Pour a little black paint onto your palette. For this step, I do not recommend chalk paint. I prefer using high-quality multi-surface acrylic craft paint or enamel paint because I find they are richer and more pigmented.
I love the way Folk Art multisurface paint goes on so that’s what I recommend using.
With a small round paintbrush brush or liner brush, paint over top of the pencil line with black paint. Then fill in the spot.
Take your time and have fun with it. A liner brush works better for this step because it gives you more control over the finer edges and details.

If you feel you need to do a second coat you can but I usually don’t. The black paint covers very well with just one. Allow the jar to dry overnight.
Apply Sealer
To ensure your cow print Mason jar lasts it’s best to seal it. I use a wide flat brush and paint on a thin coat of Modpodge to do this.
Take care around the grooves and the rim as it can get a little goopy in these areas so use a smaller paintbrush. Just be sure you get every area of the jar.
You can also use different types of clearcoat. I really like using this DecoArt Satin Varnish for my projects. You can also use a spray can sealer. If you choose something like polycrylic spray, I recommend a “non-yellowing” Minwax Protective Finish Spray.
Using the same technique as when you painted the white, do the bottom at the very end by placing the jar upside down on your work surface.
Mason Jar Lid
To lid or not to lid, that is the question…the answer is, it’s entirely up to you. If you want to keep it simple, just screw the metal band on the top. If you are using the jar as a piggy bank or a container to hold Christmas candies or something similar, you will need the lid and the band.
You can also choose to paint the lid and the metal band with black paint. Apply 2 coats and seal with clearcoat when dry.
Finishing Touches
Once your cow jar is completely dry, it’s time to make it extra pretty with some finishing touches! I like the simplicity of tying a length of skinny jute cord around the neck of the jar but I have also used burlap and lace ribbon.
At Christmas time, a red or green and red plaid ribbon tied in a bow looks cute and festive.
Hit Pinterest or Etsy for inspiration as to how to finish of your masterpiece. The possibilities are endless! I’ve even seen these cow print Mason jars with a small cowbell tied onto the top, very country-chic.
I hope you found this step-by-step process helpful and easy to follow. If you are a visual learner, check out the short video below and you can watch me paint one of these.
Cow Print Mason Jars Uses
Well, since you’re already here, I assume you know why you want to paint a cow jar, haha… but if not, here are some suggested uses:
- Centerpieces for any type of country-themed party celebration
- Farm birthday party
- Bridal shower
- Baby Shower
- Farmhouse Decor
- Flower Vase
- Storage Container for kitchen utensils, pens & pencils, paintbrushes
- Money Jar or Bank for kids
- Perfect gift idea for cow lovers!
They are the cutest DIY cow mason jars ever and are easy enough for even a beginner to make! Happy crafting!
Until next time, Luna
You May Also Like:
- Cow Print Mason Jars: Cute & Easy DIY
- Smush Painting For Babies, Toddlers & Kids
- 25 Christmas Wine Glass Painting Ideas to Brighten Your Holidays
- Create Your DIY Christmas Mason Jar Luminaries!
- How To Paint Wine Glasses: Cheers To DIY Creativity!
Luna Selene Creations is a participant in the Amazon Services LLC Associates Program, an affiliate advertising program designed to provide a means for sites to earn advertising fees by advertising and linking to Amazon.com
